Monday 7 May 2018

More Cards using the Olivia Kits


Hello again my crafty friends! Cathi back again with my first projects featuring the gorgeous Olivia kits!! I went back to my first love, cards! These are always made easy with the Scrappery kits and the gorgeous collection More than Words by Cocoa Vanilla Studio, featured in this month's Olivia kits!  My main card I made features the Colour Kit (TCK) which I don't always use as much as I want to! This month I made a point of using the TCK to feature in my cards.


My first card here I decided to use most of the TCK.  For the base of the card I chose the "Precious" paper from the More than Words collection found in the main Scrapbooking Kit (TSK).  I added the Nuvo Creations paste and the plus stencil to the background and then used the embossing ink and stamps from the TCK to make the "love you" and hearts.  I added tons of layers, including lots of floral ephemera from the TSK. I added the chipboard sticker frame and butterfly to my collage. The coral paper flowers and clear rhinestones from Kaisercraft are found in the Bits and Pieces Kit (BPK).  I added the cardstock text sticker from the Pretty Little Kit (PLK) and finished off the card with some blue stitching and some twine.


My second card uses the "Collage" paper from the TSK as its base. I have layered a cut out from the "Treasure" paper along with some of the vellum. I added a bit of twine behind them. The coral small flowers and flair button come from the BPK, while the larger flowers and ephemera piece come from the TSK. The vellum butterfly is from the PLK.


For my final card I have again used the "Collage" paper from the TSK.  I have layered many gorgeous ephemera pieces and the chipboard sticker frames from the TSK along with the heart puffy stickers.  The "love you so much" sticker and butterfly vellum piece are from the PLK.  I finished the card off with twine and some stitching.

I hope you enjoyed my second set of cards with the kits and will consider subscribing. You can find the subscriptions HERE. Hope to see you back soon!!


Monday 30 April 2018

Olivia Kits: Traveler's Notebook Layout


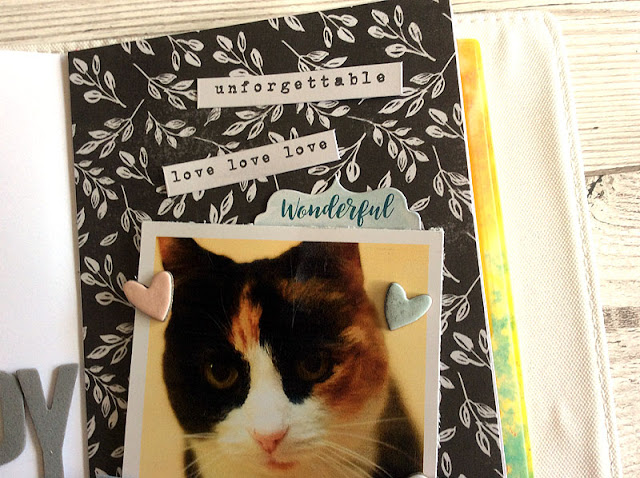
Hello again my crafty friends! Cathi back again with a traveler's notebook layout featuring the gorgeous Olivia kits!!  As I mentioned last week, our beloved cat (Unfortunately named Stumpy due to her stumpy tail, broken by a mean tomcat. My husband named her!!) passed away at 18 after a very short illness, thankfully. We were all heartbroken, especially because she has always been in such good health, and we just weren't prepared for it.  I knew I needed to do a layout as a tribute to her memory and the Cocoa Vanilla More than Words collection in the Olivia kits had some wonderful quotes and words about love that worked perfectly.


For the background paper I used on the photo page, I took the black floral Gossamer paper from the main Scrapbooking Kit (TSK).  The black tones in with the gorgeous colouring on our kitty and with the subject matter of a memorial page and mourning.  The heart stickers are chipboard stickers from the TSK and the "wonderful" tab and text stickers are cardstock stickers from the Pretty Little Kit (PLK). 


In this photo you can see the gorgeous "You are Loved" flair button from the Bits and Pieces Kit (BPK). The ephemera "my darling" and chipboard banner are from the TSK.


On my journal page I have used the gray thickers from the TSK to spell out Stumpy's name. The cardstock sticker "so very thankful for you" is from the PLK and the heart stickers and heart and arrow chipboard stickers are from the TSK.

These kits are just so versatile: planner projects, cards, scrapbooking, even mixed media!  I will have projects in all these genres coming up in the next few weeks! I hope that you will come and have a look at the kits and consider subscribing!!  You can find the subscriptions HERE. Hope to see you here soon!!

Monday 23 April 2018

Planner Projects with the Olivia Kits!


Hello again my crafty friends! Cathi back again with some projects featuring the gorgeous Olivia kits!!  I missed last week as we had our beloved pet of 18 years, "Stumpy", our cat, pass away unexpectedly after a very short illness. We weren't expecting it as she had been in great health for so long and it hit the whole family very hard and I got sidetracked with my projects.  Next week I will be doing a Traveler's Notebook layout commemorating our cat with this gorgeous kit. We are still expecting to see her around every corner and it will take us a while to get used to her absence. Sigh.  My first set of projects here are the journal covers I made for my traveler's notebook. I love to change these every kit even if the notebook inside them might remain for several months. It freshens the look of my notebook and keeps the creative juices flowing.  The More than Words collection from Cocoa Vanilla is just so beautiful and feminine I am really loving the colors and how these projects turned out.


My first notebook cover uses the gorgeous watercolor paper "Darling Buds" from the More than Words collection found in the main Scrappery Kit (TSK). The deer is a chipboard sticker and puffy heart stickers are also from the TSK.  I fussy cut some butterflies from a journaling card in the Pretty Little Kit (PLK) and the cardstock stickers are from the PLK as well.  The rhinestones on the butterflies are from the Bits and Pieces Kit (BPK).


My next notebook cover is the gorgeous chevron paper from the TSK.  The flower and "moments" stickers are chipboard stickers from the  TSK as well as the puffy heart and the ephemera piece "remember this". The cardstock text sticker is from the PLK


For my final notebook cover I used the beautiful "Precious" paper from the TSK.  Again I've used chipboard frame, heart, love this and butterfly stickers from the TSK, along with the puffy heart stickers.


As well as my B6 traveler's notebook, I uses a micro sized traveler's notebook for my wallet and I have a set of 4 small dashboards that I can switch out with each new kit. For these I used a selection of papers from the TSK and a cut out from the PLK. I've added several ephemera pieces from the TSK along with my favorite puffy heart stickers. The deer is a cardstock sticker from the PLK along with the text sticker.


My final project is a planner spread using a combination of ephemera from the TSK and cardstock stickers from the PLK. I just love using the kits on planner spreads. I also did a bit of stamping using the stamp set in the PLK.

These kits are just so versatile: planner projects, cards, scrapbooking, even mixed media!  I will have projects in all these genres coming up in the next few weeks! I hope that you will come and have a look at the kits and consider subscribing!!  You can find the subscriptions HERE. Hope to see you here soon!!

Monday 9 April 2018

My First Olivia Projects: Card Set of 3


Hello again my crafty friends! Cathi back again with my first projects featuring the gorgeous Olivia kits!! I received my kits last week and got to work on several projects at once!  My first project I am sharing is a set of cards featuring the Cocoa Vanilla Studios More Than Words collection that features in these Olivia kits. Yet another gorgeous kit chock full of gorgeous items perfectly curated by our Ronelle!!

 
My mum isn't very well at the moment and I live 6000 miles away so I made this card with her in mind. I just love the "so very dear to my heart" illustration, and made that the centerpiece of my card. For the base of the card I used the polka dotted Collage paper from the More Than Words collection included in the Pretty Little Kit (PLK). I added some stitching around the edge for a bit of extra detail.  For the "dear to my heart" card, I added the vellum from the main Scrapbooking Kit (TSK) and added stitching around the card. I popped it up on foam tape in the center of the card.  The flower ephemera, heart puffy stickers and chipboard heart stickers can be found in the TSK, while the More than Words flair button and Kaisercraft blooms came from the Bits and Pieces Kit (BPK)


For my next card, I used the gorgeous floral Precious paper from the collection in the TSK. I inked the edges with distress ink and added a journaling card from the BPK. The flowers and hello lovely are chipboard stickers also from the TSK. I added some heart puffy stickers and clear rhinestones along with a vellum butterfly ephemera from the PLK.


For my final card I used another piece of the Collage paper from the TSK, again with a stitched border. I layered the weathered wood design from the Precious paper over the base and stitched the edge as well.  I added the beautiful "you make my heart sing" chipboard sticker, flowers, a butterfly and puffy heart stickers from the TSK. The twine and the sequins come from the Pretty Little Pieces kit. The flair button comes from the BPK.

I love this beautiful Cocoa Vanilla collection and the cards I made with it. I hope you like them too! These kits are so full of goodness and can work with so many different types of projects! I hope that you will come and have a look at the kits and consider subscribing!!  You can find the subscriptions HERE.  I'll be back next week with a planner project and have some layouts in planning stages! Hope to see you here soon!!


Sunday 1 April 2018

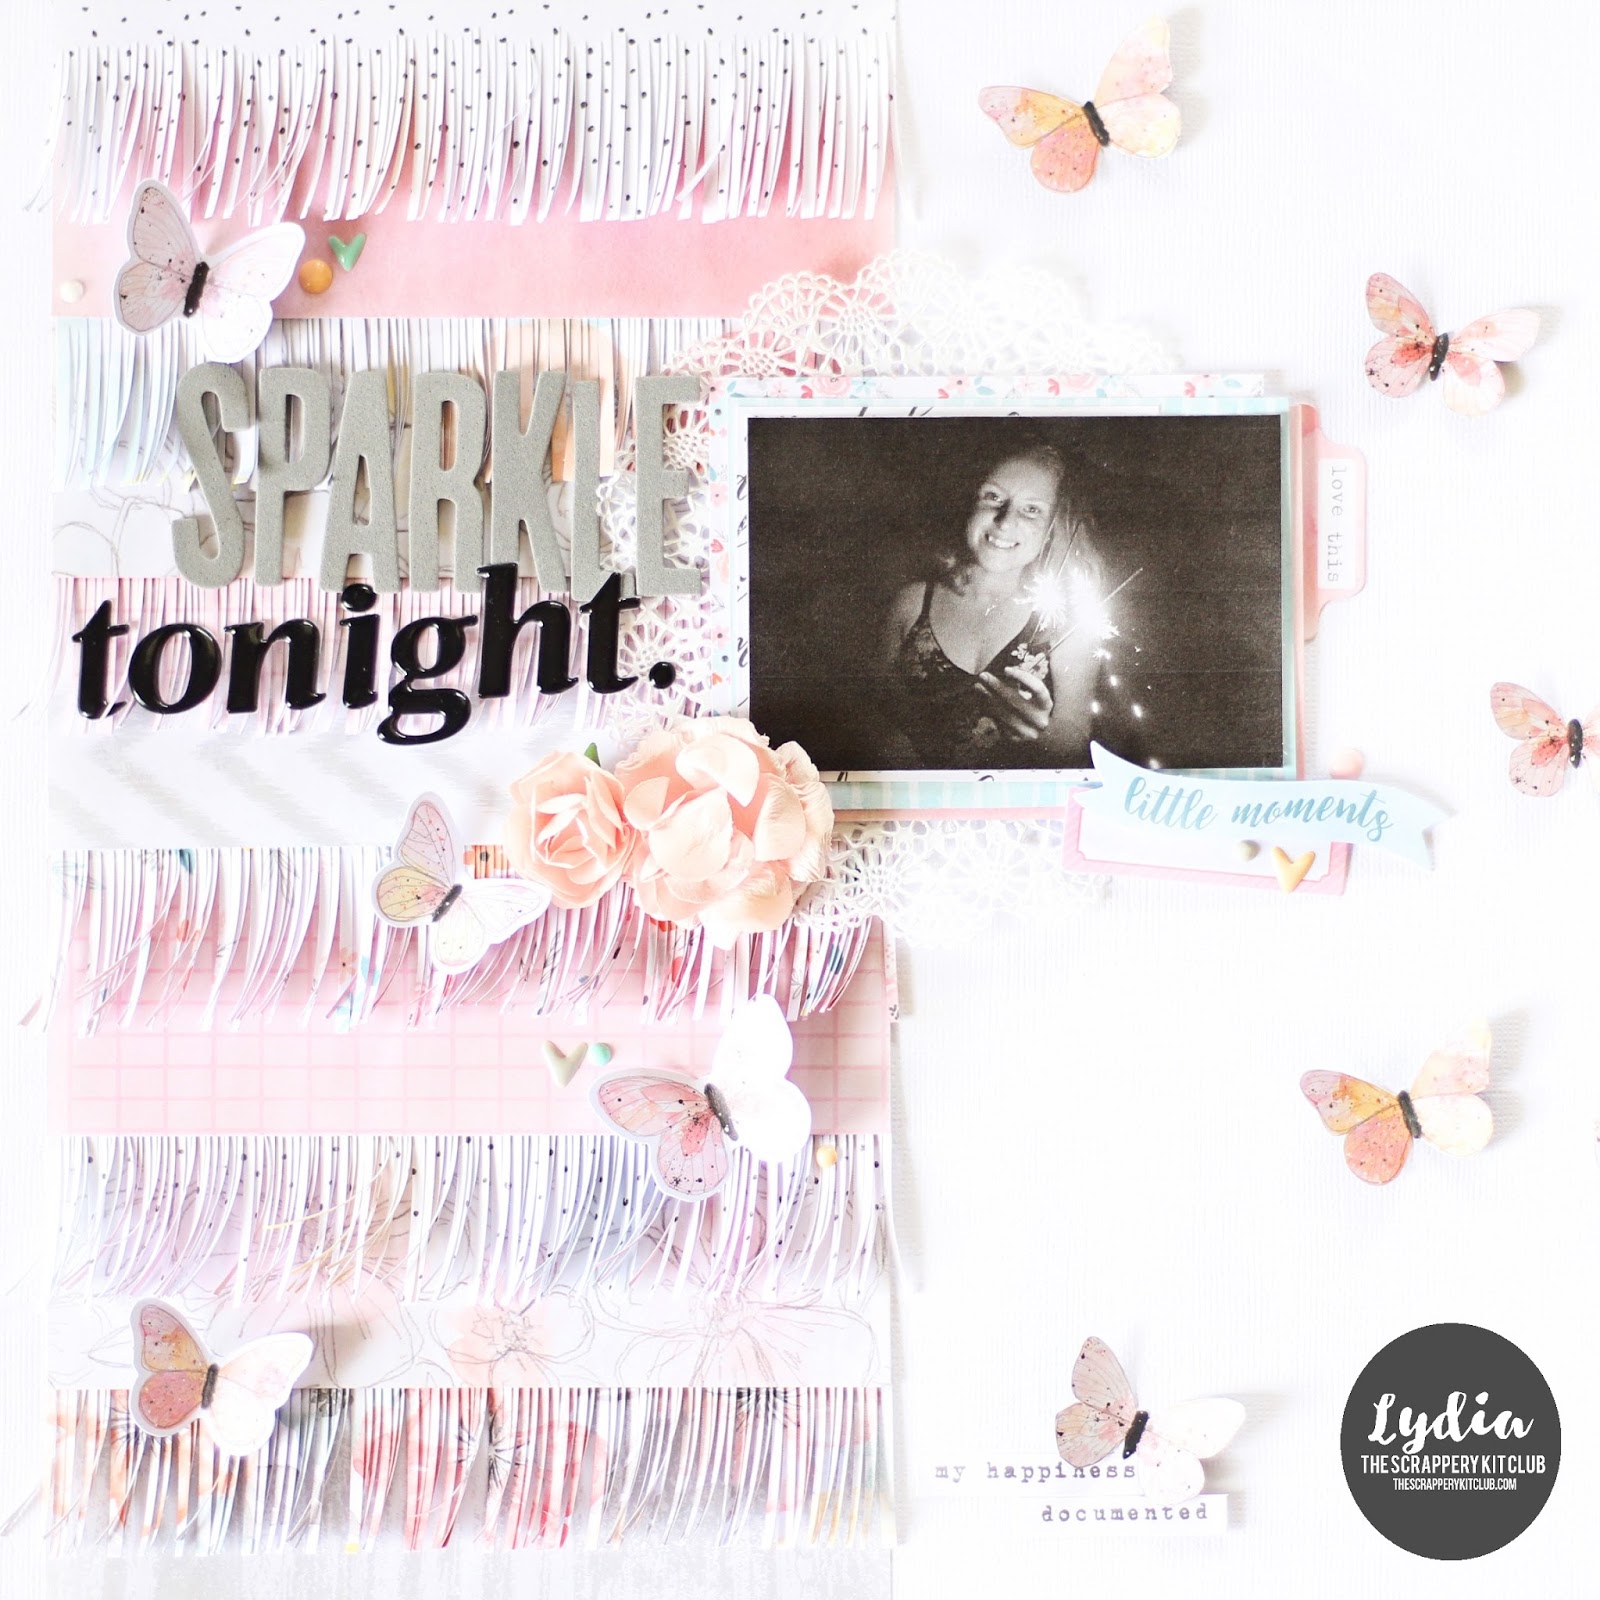
'SPARKLE tonight' - Lydia

Hello Scrappery friends, Happy Easter to you all!! I hope you are all enjoying your weekend filled with loads of chocolate and hot cross buns.
 
So today I am back to share another layout using the new 'Olivia' kits. I am hoping you have all received your kits by now and are enjoying creating with them. 
 
 
Now what's a layout without some pretty KaiserCraft flowers. These blush flowers work beautifully with the Cocoa Vanilla Studio collection 'More Than Words'. This collection is also perfect for those Easter photos you will have to documenting as the pastel colours are perfect.
 
 
I can just say now that all my projects using the 'Olivia' kits will have fussy cut butterflies, because they are gorgeous.  
 
 
This layout doesn't have many embellishments are the main feature is the fringed paper that I cut using the patterned paper in he kits. For my title I added I used the two differ Thickers that come in the kits tooo.


Again, I hope you are all enjoying your Easter weekend and maybe get a little creative time to have a pay with your kits.
 
Lydia xxx 


Sunday 18 March 2018

'SNAP' - Lydia

Good morning scrappy friends. I hope you are all having a wonderful weekend and that you have all received your new "Olivia" kits.

Today I am sharing another 12x12 layout using the last kit called "Willow". I love this kit as it has such bright fun colours. So here is my layout, featuring some hexagons.


These Thinkers in the "Willow" kit are stunning, I love them so much. They are just perfect to give the layout a little bit of sparkle.
 
 
I had a lot of fun picking out the patterned paper for the hexagons. Once I had worked out the placement of each one I picked a few to hand stitch around with just some white embroidery thread.
 
 
Of course I made some clusters around the layout. This cluster below has some thin embroidery thread as well as one of the pretty charms from the 'Good Vibes' Crate Paper collection which is feature in these kits, some enamel dots and that gorgeous bird ephemera from the ephemera pack. It's the bird the cutest?
 
 
I used the stamp set from the "Good Vibes" collection that is in the kit as well to add a bit of a feature to where there was some plain space on the layout. And I love that typewriter font too.
 
 
And another little cluster.


Overall I had some fun making this layout and I hope you are inspired to finish the weekend with some creative time.
 
Have a great day Lydia xxx


Thursday 15 March 2018

Cute tags created with the "Willow" kit

Hi there 
Lisa here today to share a fun project using the "Willow" kits,
There were so many cute elements in these kits - I thought I'd have a go at making some tags.
It's a great project to do if you're lacking a bit of mojo. You don't really need a plan - just the supplies to hand, then it all seems to come together.


Once I had started the first one my creativity just kept flowing. These tags will make a good addition to my stash for gifts or happy mail.


I used some die cut tags from the die cut 12x12 page and I cut some of my own tags from the patterned paper.

I used various elements to decorate them, stickers, ephemera, washi tape, cork stars, bling - all from the kits & I punched some shapes with scraps.


Some close ups of the detail...


More close ups...

Thanks so much for stopping by, I hep you've enjoyed my share. Pop over to the shop to check out our kits & other goodies available.


Sunday 11 March 2018

'magic' - Lydia

Good morning beautiful creative people, Lydia back finally to share another project. It's been a long time! It's been a crazy start to the year and getting used to grade 12 and all that it has install for me this year, including the huge workload that has taken weeks to get used to. But I am finally on top and ready to get fully organised and start creating and sharing again.

What better way to start sharing again with the brand new 'Olivia' kits. These kits are so sunning filled with the beautiful pastel colours of the new Cocoa Vanilla Studio collection 'More Than Words'.

So today I am sharing my first creation of a 12x12 layout using these kits.

 
I always find it so easy to create using colours and elements that I love. So working with the pinks, blues and butterflies this layout came together quite quick.
 
For this layout I did go for a more minimalistic style using the vellum black and white florals with the pops of pinks and corals from the butterflies. I also love the contrast from the greys to the bold black of those gorgeous Thickers. 
 
 
Of course I had to add some dimension using these KaiserCraft florals as a cluster under the photo.
 
 
On the opposite bottom side of the image to the KiaserCraft florals, I added a few pieces of ephemera from the ephemera pack as well as a ever beautiful flair from the collection. I also added some enamel dots/hearts around the whole layout too.
 
 
Over the whole layout are fussy cut butterflies from one of the 12x12 papers. I paired the butterflies with some of the vellum florals. I love how they are give the feeling that they are fling around the page.


And that is my first project using these kits. My fingers are crossed that you all receive your kits very soon to be able to start creating with such beautiful products.
 
Have a great Sunday.
Lydia xxx


Thursday 8 March 2018

12 x 12 Scrapbook Layout using the "Willow" kits

Hi there 
Lisa here today to share a layout using the "Willow" kits.
These kits are certainly one of my faves with all the gorgeous Crate Paper "Good Vibes" collection.


The pom pom trim frames & the super fun embellishments are perfect for these snap chat photos.


Using layers of tags & frames angled is a great way to draw attention to your photos while still keeping everything cohesive - so it doesn't look out of place.


Here are some close up of the detail...I punched some tiny hearts out of the patterned paper - which went really well with the spray of gems.


Thanks for stopping by, I hope you've enjoyed my share.
Make sure you pop over to the shop to check out or subscription options & other items available to purchase.

Monday 5 March 2018

Off the Page Project with the Willow Kits!


Hello again my crafty friends! Cathi back again with an Off the Page project featuring the Color Kit (TCK) and all the other gorgeous Willow kits!  I haven't played with my mixed media goodies in a while and it felt great to work on a project featuring layers and layers of goodies from the Willow Kits and their gorgeous TCK.   Wondering what the final project is?  It is a gorgeous key organizer that I have had laying around for a while to upcycle!


The paint color on the frame ties in perfectly with the Willow Kit colors and I can't wait to have my husband help me get it up on the wall this week!!


In my first closeup you can see all the layers of paper and media I used on this project! I used the dot stamp from the TCK here with my Shabby Shutters Distress Ink. I also layered the Kaisercraft Abstract Triangles stencil that was in the TCK using the Worn Lipstick Distress Ink in my collection. On top of the background paper I layered many of the ephemera from the TSK as well as the cardstock stickers from the Pretty Little Kit (PLK).  


I have used the Moroccan Tile stencil included with the birthday gifts we received with the Willow kits and used the Faber Castell gold Texture Luxe from the TCK. The gold doily is from the Pretty Little Pieces bag in the TSK.


The pompom frame can be found in the Bits and Pieces Kit (BPK) and that gorgeous Yay charm in the the TSK along with the pink rhinestones.

I love how my Key Organizer project turned out, it has been too long since I played with my mixed media goodies!. I hope you like the project I have made for this week! These kits are so full of goodness and can work with so many different types of projects! I hope that you will come and have a look at the kits and consider subscribing!!  You can find the subscriptions HERE.  I'll be back next week with another project!